Why agents need paid metadata refresh
AI agents operate on speed and autonomy, but NFT marketplaces are built for humans. When an agent needs to verify the current owner of a token, check a trait rarity, or confirm a floor price, it faces a high-frequency API wall. Traditional APIs either throttle these requests aggressively or require manual credit card payments that agents cannot process. Without a standardized way to pay for data, agents are effectively blind, unable to execute trades or verify asset ownership in real time.
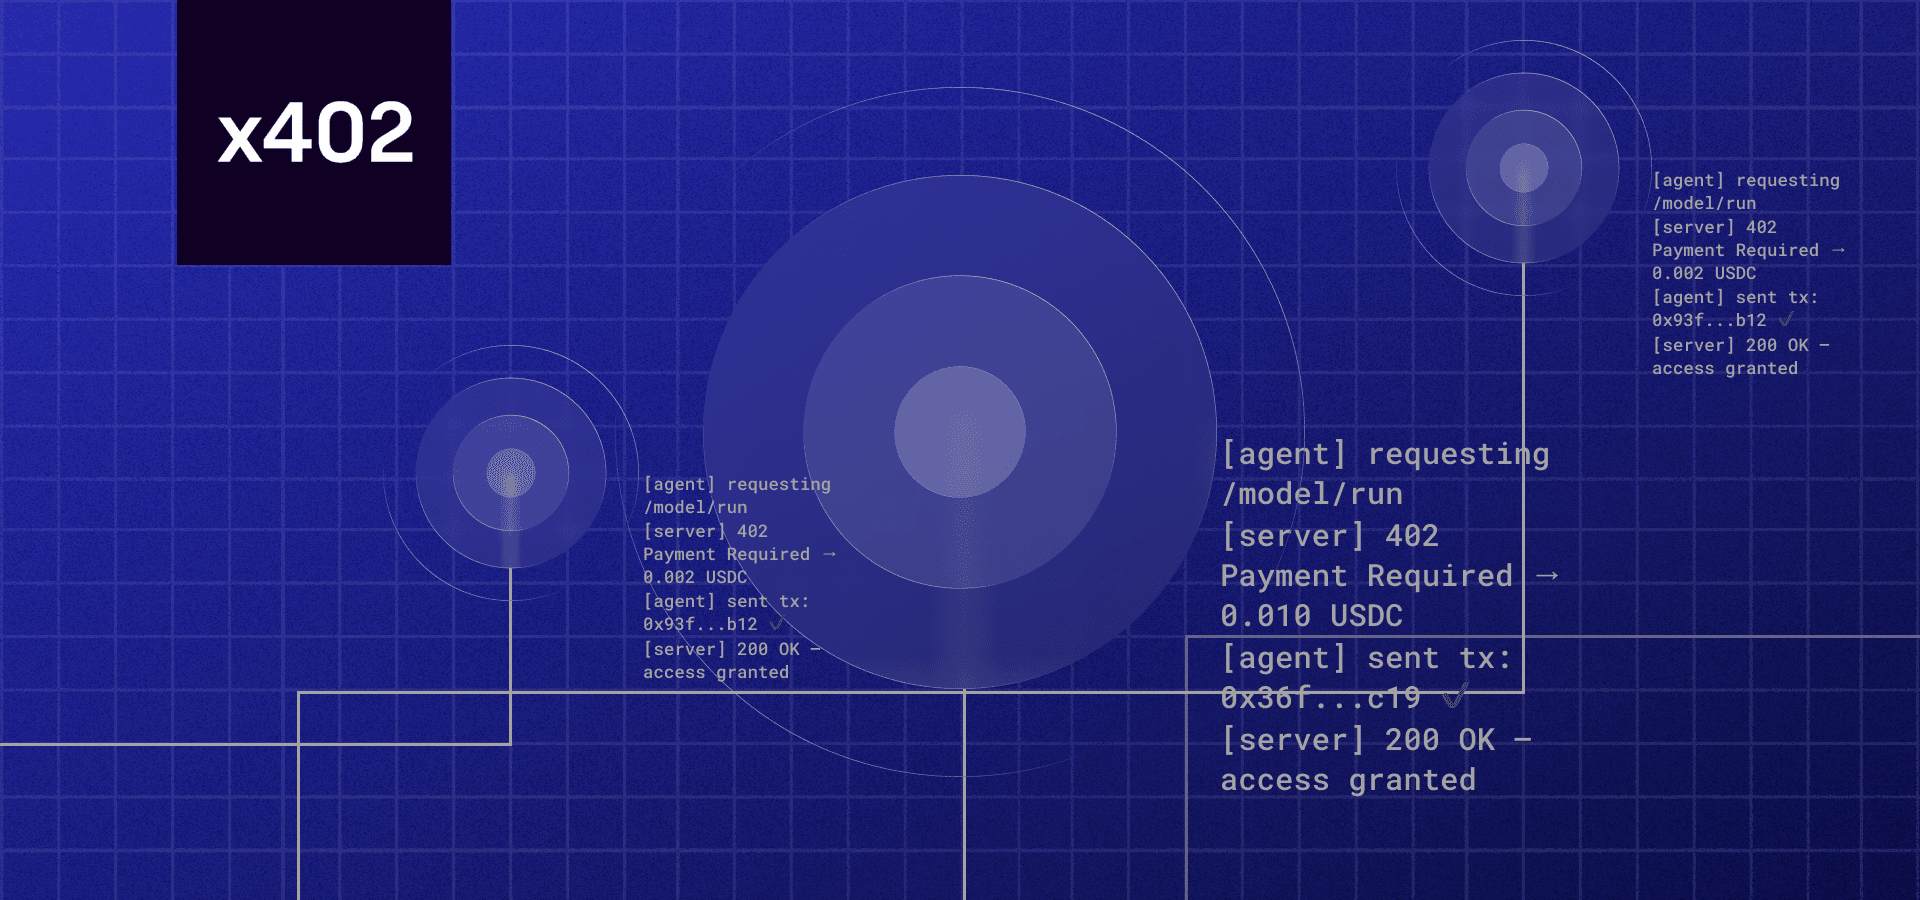
x402 solves this friction by embedding payment logic directly into the HTTP response. Instead of a separate checkout flow, an API endpoint can return a 402 Payment Required status along with a payment request. The agent pays in stablecoins like USDC, and the server immediately returns the requested metadata. This machine-to-machine commerce model turns high-cost, high-frequency data queries into a sustainable business model for protocol builders.
This shift is critical for NFT infrastructure. Metadata is not static; it changes with every transfer, mint, or trait update. Agents that rely on cached or stale data will execute bad trades, damaging their reputation and financial standing. By using x402, you enable agents to fetch the freshest possible data on every single request, ensuring accuracy while ensuring you are compensated for the computational cost of serving that data.
The economic model is straightforward: you monetize the bandwidth and compute required to serve metadata. As AI agents proliferate, the volume of API calls will explode. x402 ensures that every call generates revenue, turning what was previously a cost center (server load) into a profit center. This is not just about convenience; it is about building the necessary economic layer for autonomous digital commerce.
Setting up the x402 payment gateway
To enable automated agent commerce, your API endpoint needs a way to verify that a buyer—or their AI agent—has actually paid before serving sensitive NFT metadata. The x402 facilitator acts as the bridge between your server and the blockchain, handling the complex logic of transaction verification so you don't have to.
We will use the Coinbase Developer Platform (CDP) as our facilitator, as it provides a robust SDK for Node.js that simplifies the integration. This setup ensures that your endpoint can reject requests that lack valid payment proofs while accepting standard USDC transfers on supported chains.
Install the x402 facilitator SDK
Start by adding the official SDK to your project. This library provides the x402 class and helper functions needed to parse payment headers and verify transactions on-chain.
npm install @coinbase/developer-sdk
Initialize the Facilitator Client
Next, configure the facilitator in your server environment. You will need your Coinbase API key and secret, which you can generate from the CDP dashboard. These credentials allow your server to communicate with the blockchain indexer to verify payment status.
import { X402 } from '@coinbase/developer-sdk';

const x402 = new X402({
  apiKey: process.env.COINBASE_API_KEY,
  apiSecret: process.env.COINBASE_API_SECRET,
  chainId: 137, // Polygon mainnet for low-cost USDC transactions
});
Create the Payment Verification Middleware
Now, wrap your metadata endpoint with a verification middleware. This function intercepts incoming requests, extracts the x-pay header (which contains the transaction hash), and calls the facilitator to confirm the payment was received.
app.get('/api/nft-metadata/:tokenId', async (req, res) => {
  try {
    // Verify the payment proof in the request header
    const payment = await x402.verifyPayment(req.headers['x-pay']);

    if (!payment.success) {
      return res.status(402).json({ error: 'Payment required' });
    }

    // Serve the metadata only after successful verification
    const metadata = await fetchMetadataFromIPFS(req.params.tokenId);
    res.json(metadata);
  } catch (error) {
    res.status(500).json({ error: 'Internal server error' });
  }
});
Test with a Simulated Transaction
Before deploying, test the flow using a testnet transaction. Send a small amount of USDC from a test wallet to your facilitator's designated address, then include the resulting transaction hash in your x-pay header. The facilitator should return a success status, allowing your endpoint to serve the protected data.
Connect to NFT Metadata Providers
Once the payment is verified, the endpoint needs to notify the marketplace that the asset has changed hands. This isn't just a display update; it ensures the new owner sees the correct traits and ownership status immediately. You will typically use the official APIs from OpenSea or Alchemy to trigger this refresh.
The process is straightforward: your server sends a request to the provider with the contract address and token ID. The provider then updates its cache. Below is the step-by-step flow for integrating this into your x402 endpoint.

Before making any API calls, you need valid credentials. For OpenSea, generate an API key from their developer dashboard. For Alchemy, retrieve your NFT API key from the Alchemy console. Store these as environment variables in your backend to keep them secure. Never hardcode these keys in your source code.
After the transaction is confirmed on-chain, your endpoint should make a POST request to the provider's refresh endpoint. For OpenSea, this is /api/v1/nfts/{contract_address}/{token_id}/refresh. For Alchemy, use the refreshNftMetadata endpoint. Pass the contract address and token ID as parameters. This tells the provider to pull the latest data from the blockchain.
Providers enforce rate limits to prevent abuse. If you exceed these limits, you will receive a 429 Too Many Requests error. Implement exponential backoff in your code to retry failed requests. Also, check the response body for specific error codes, such as invalid token IDs or unsupported chains, to debug issues quickly.
Provider Comparison
Choosing between OpenSea and Alchemy depends on your infrastructure needs. OpenSea is the default for most marketplaces, while Alchemy offers more granular control and better performance for high-volume applications.
| Provider | Rate Limit | Supported Chains | Response Format |
|---|---|---|---|
| OpenSea | 100 req/min | Multi-chain | JSON |
| Alchemy | 30 req/min | EVM (Mainnet/Testnet) | JSON |
Implementation Checklist
-
Verify payment on-chain before calling the refresh API.
-
Store API keys in environment variables.
-
Implement retry logic for 429 errors.
-
Log successful refresh responses for auditing.
Handling errors and retry logic
In agent commerce, reliability isn't a feature—it's the product. When your x402 endpoint triggers a metadata refresh on OpenSea or another marketplace, you're asking a third-party service to do work. Sometimes that service is slow, sometimes it's down, and sometimes it rejects your request outright. To prevent your agent from failing silently or flooding APIs with useless requests, you need a robust error handling strategy.
Start by distinguishing between fatal errors and transient failures. A 401 Unauthorized or 403 Forbidden response means your API keys are invalid or expired. No amount of retrying will fix this; you need to alert the operator and halt execution immediately. Conversely, 500 Internal Server Error or 502 Bad Gateway responses are often temporary hiccups. These are safe to retry.
For transient failures, implement exponential backoff. If the first refresh attempt fails, wait one second before trying again. If that fails, wait two seconds, then four, and so on. This prevents your agent from hammering the provider's servers during an outage. Most modern HTTP clients support this out of the box, but if you're writing raw fetch calls, you'll need to build a simple loop that respects these intervals.
async function refreshWithRetry(url, options, maxRetries = 3) {
  for (let i = 0; i < maxRetries; i++) {
    try {
      const response = await fetch(url, options);
      if (response.ok) return response.json();

      // Fatal errors: do not retry
      if (response.status === 401 || response.status === 403) {
        throw new Error(`Auth error: ${response.status}`);
      }

      // Retryable errors: wait and try again
      await new Promise(resolve => setTimeout(resolve, Math.pow(2, i) * 1000));
    } catch (error) {
      if (i === maxRetries - 1) throw error;
    }
  }
}
This approach ensures your agent commerce flow remains resilient. By treating 401/403 errors as critical failures and using exponential backoff for temporary glitches, you keep your operations smooth and your costs predictable. Remember, a failed refresh is just a data sync issue; a failed auth check is a security problem. Handle them differently.
Validating metadata before delivery
Before the endpoint returns the refreshed metadata to the paying agent, you must ensure it conforms to the expected schema. On Hedera, this means validating against the HIP-412 standard. A malformed payload can cause transaction failures or render the NFT unreadable by marketplaces.
Use the Metadata Validator provided by Hedera to check your JSON structure. It verifies compliance with the HIP-412 (NFT Token Metadata JSON Schema v2) standards, ensuring proper representation of the asset's origin, ownership, and media links. You can upload a single JSON file or a CSV to run these checks locally before deployment.
Additionally, verify that the final metadata payload does not exceed the 100-byte limit for on-chain storage, as specified in the Hedera NFT metadata docs. Keeping the data concise ensures faster propagation and lower gas costs. Only after these checks pass should the endpoint serve the data to the agent.
Common questions about x402 and NFTs
When building automated commerce endpoints, understanding how metadata functions and how to validate it is essential for maintaining trust with agent buyers. Below are answers to the most frequent technical questions regarding NFT metadata and x402 integration.
No comments yet. Be the first to share your thoughts!