Why AI agents need paid metadata access
NFT metadata has shifted from a static asset to a high-frequency data stream. AI agents scanning marketplaces like OpenSea or querying RPC nodes via Alchemy require real-time accuracy to function. They cannot wait for manual human verification, nor can they afford the latency of unverified cached data. The demand for instant, reliable on-chain context is now a core infrastructure requirement.
This creates a bottleneck. Traditional API models are either free (leading to abuse and rate-limiting) or expensive (requiring enterprise contracts). x402 bridges this gap by enabling micro-payments directly at the point of access. An AI agent can pay a fraction of a cent to fetch the latest token URI, ensuring the data is fresh and the creator is compensated.
For creators, this means turning metadata into a live revenue stream. Instead of relying on secondary sales, you can monetize the utility of your data itself. By building x402 endpoints, you allow AI agents to pay for accuracy, creating a sustainable model for maintaining high-quality, up-to-date NFT information.
Setting up the x402 payment gateway
To let AI agents and users pay for your NFT metadata updates, you need a facilitator to handle the transaction logic. The x402 standard relies on a facilitator to verify that a payment has been made on-chain before granting access to your API. For this setup, we will use the Coinbase Developer Platform (CDP) facilitator, which integrates cleanly with USDC.
The following steps walk you through configuring the gateway to accept micro-payments.
Start by creating an account at CDP.coinbase.com. This gives you access to the necessary APIs and the facilitator infrastructure. You will need to verify your identity and enable the API keys required for server-to-server communication.

Install the @coinbase/cdp-x402-facilitator package in your project. Create a .env file to store your CDP_API_KEY_ID, CDP_API_KEY_SECRET, and the FACILITATOR_URL. Ensure your server is configured to read these variables securely before initializing the facilitator instance.
x402 requires a smart contract to handle the payments. Deploy a simple ERC-20 contract for USDC on your target chain (e.g., Base, Ethereum, or Solana). You will need the contract address to configure the facilitator. This contract acts as the escrow that verifies the buyer's payment before your API returns data.

Integrate the facilitator into your API route handler. The middleware should intercept incoming requests, extract the payment proof (token), and forward it to the facilitator for verification. If the payment is valid, the facilitator allows the request to proceed to your metadata logic.
Before going live, test the endpoint with a small USDC transaction. Use a testnet wallet to send a few USDC tokens and verify that your API returns the metadata only after the facilitator confirms the on-chain transaction. Check your logs to ensure the payment verification logic is triggering correctly.
With the gateway active, your API is now ready to accept payments. The facilitator handles the complex verification, allowing you to focus on the metadata refresh logic itself. This setup ensures that only paying agents or users can access your high-value NFT data.
Integrating NFT metadata refresh logic
The core of your x402 endpoint is the ability to trigger metadata updates on-chain or via indexer. When a user pays the required fee, your backend must call the appropriate provider API to fetch the latest token data. This ensures that attributes, images, and names stay in sync with the actual smart contract state.
1. Authenticate with Provider Credentials
Before making any calls, you need valid API keys. OpenSea and Alchemy both require authentication headers. Store these keys securely in your environment variables. Never expose them in client-side code or public repositories. You will use these credentials to sign requests to the provider’s servers.
2. Construct the Refresh Request
The request payload differs slightly between providers. OpenSea expects a contractAddress and tokenId. Alchemy’s v3 API requires the same fields but may also accept a contractType for broader support. Ensure your x402 route validates these inputs to prevent malformed requests from reaching the provider. A simple JSON object with these two fields is usually sufficient.
3. Execute the API Call
Use a server-side HTTP client to send the request. Check the response status code. A 200 or 202 typically means the refresh is queued. If you get a 400 or 401, log the error and return a clear message to the user. This step is where the x402 fee logic intersects with the actual work; the payment must be confirmed before you proceed.
4. Handle Rate Limits and Queues
Providers often rate-limit metadata refreshes to prevent abuse. If you hit a limit, implement a retry mechanism with exponential backoff. Some providers queue requests, meaning the update isn’t instant. Inform your users that there may be a slight delay before the new metadata appears on the marketplace.
The chart above shows recent ETH volatility. High gas fees can impact the cost of the underlying transaction that triggers these updates. Keep an eye on network conditions to optimize user experience during peak times.
Handling errors and rate limits
NFT metadata refreshes are rarely simple GET requests. You are interacting with blockchain data, third-party indexers, and payment rails simultaneously. When one link in that chain breaks, your x402 endpoint needs to know exactly how to react without charging the user for a broken promise.
The most common failure points are authentication errors (401/403) and conflict errors (409). A 401 means the user’s wallet signature is invalid or expired. A 403 usually indicates the user doesn’t own the NFT or has already paid for this specific refresh. A 409 happens when another request is already processing the same token ID. In all three cases, the payment gateway must not charge the user.
x402 endpoints handle this by checking the response status before finalizing the transaction. If the upstream provider (like OpenSea or Alchemy) returns an error, the endpoint should return a 200 OK with a refund flag set to true, or simply fail the transaction before it reaches the blockchain. This ensures the user isn’t charged for a failed attempt.
To make this clear, here is how different error codes should be handled in your x402 logic:
| Error Code | Common Cause | x402 Action |
|---|---|---|
| 401 | Invalid signature or expired token | Return refund=true, no charge |
| 403 | Unauthorized access or already paid | Return refund=true, no charge |
| 409 | Concurrent refresh request | Queue or return refund=true |
| 429 | Rate limit exceeded | Retry with backoff, no charge |
Rate limits (429) are particularly tricky. If you hit a limit, do not charge the user. Instead, implement a retry mechanism with exponential backoff. Wait a few seconds and try again. If it fails after three attempts, return a refund flag to the user so they can try later. This prevents frustration and ensures you only charge for successful, completed metadata updates.
By treating errors as first-class citizens in your x402 logic, you build trust. Users know they won’t be charged for broken links, and you avoid the support headaches of refunding accidental charges.
Testing Your Paid Metadata Endpoint
Before you flip the switch on a live x402 endpoint, you need to verify that the payment flow actually triggers the metadata update. A broken payment handler means your NFTs stay stale, and buyers lose trust. Follow this checklist to ensure the handshake between the payment gateway and your metadata store works flawlessly.
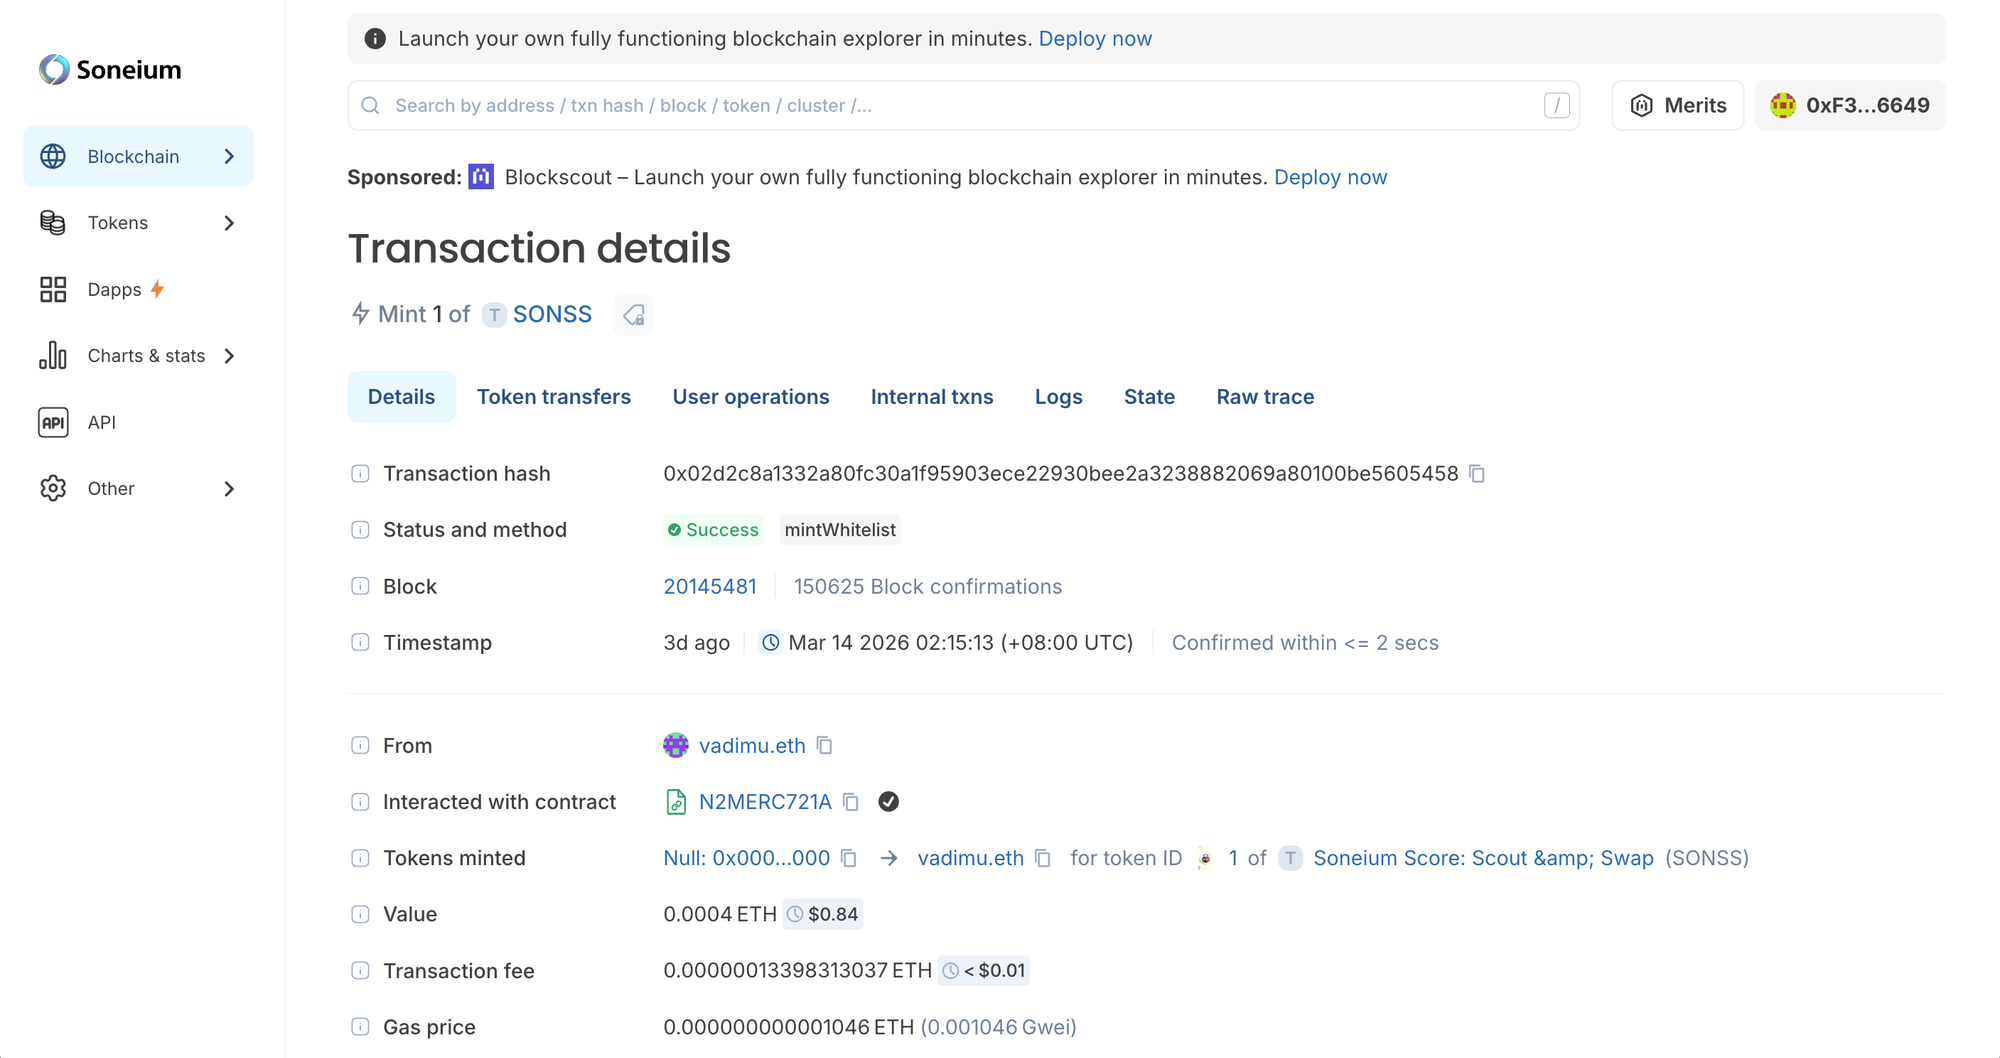
Send a small, real transaction to your endpoint using a test wallet. Use a low-value token or a testnet equivalent to avoid gas fees. Confirm that the endpoint returns a success status only after the transaction is confirmed on-chain. This proves your payment listener is active and responsive.
Check the metadata URI after the payment. If your endpoint is working, the tokenURI should point to updated content with a new hash. Use a block explorer or a metadata viewer to compare the old hash against the new one. If the hash hasn't changed, your payment logic isn't triggering the update function.
Simulate failed payments, double-spends, and network timeouts. Ensure your endpoint doesn't update metadata for unconfirmed transactions. Test what happens if the buyer cancels or if the gas price spikes. Your endpoint should be resilient to these common blockchain quirks without corrupting the metadata state.
Once you've verified these steps, your x402 endpoint is ready for production. This testing phase ensures that every payment results in a reliable, immutable metadata update, keeping your NFT collection accurate and trustworthy.
No comments yet. Be the first to share your thoughts!